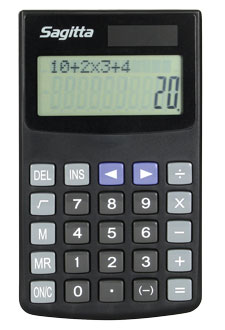
| Calculators
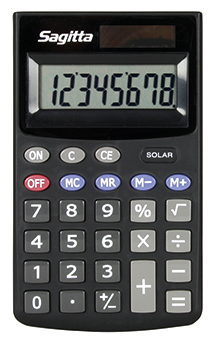
Solar cells
Solar cell calculators are available in two versions: "Genuine solar cell calculators" and "Dual Power".
Genuine solar cell calculators, such as our Calculator solar cell with cover, operate entirely without batteries. The solar cells in these are so powerful that they can provide power even in poor light. A genuine solar cell calculator helps you avoid the hassle and cost of replacing batteries.
Dual Power calculators have both a solar cell and a battery. When the light is poor, the battery powers the calculator. There are also two types of Dual Power calculator.
A "Genuine Dual Power calculator" works in good light by means of the solar cell even if the battery is removed or spent. Our two-row basic calculators are like this, for example. In simple Dual Power calculators, the battery also operates as a voltage stabiliser. They are cheap to manufacture, but they do not work without batteries
Keys
There are calculators with "real plastic keys" and calculators with "rubber keys".
Real plastic keys are made of a hard plastic and have a collar on the inside of
the keypad which prevents them from being poked out.
Rubber keys are actually a continuous rubber pad. The rubber between the keys is thin and can easily break after lots of use or if a little force is used.
Rubber keys are a lot cheaper to manufacture and fit than real plastic keys, but they are not very durable.
Display
The connection between the display and the PCB is the weak point of the calculator. Most calculators have a heat welded plastic tape that conducts the currents.
Many students like pressing the display to see the nice patterns that form. If you press the display too much the plastic tape can come loose, resulting in incomplete digits.
Another good solution on some calculators is a transparent disc mounted in front of the display to protect it, as on our two-row calculators and scientific calculators.
|
|
|
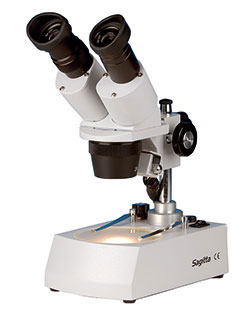
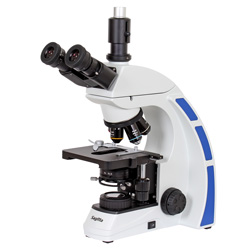
Microscopes / Stereo microscopes
The difference between stereo microscopes and microscopes
Stereo microscopes have both double lenses and eyepieces. As the light rays striking the eyes have gone completely different ways, you have depth perception when you look into a stereo microscope.
A stereo microscope normally allows you to choose between 20x and 40x magnification. The magnification of a stereo microscope with zoom is infinitely adjustable, and so you can achieve precisely the enlargement you want for observing a specific object.
Stereo microscopes are good for looking at tiny creatures or plant details.
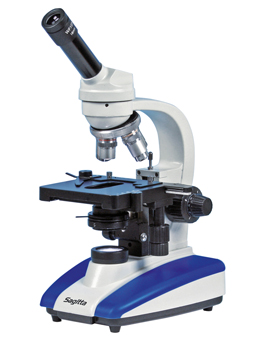
In a binocular microscope, the light rays first pass through the lens selected and then spread out to each of the eyepieces. This means you have no depth perception, but the microscope is comfortable to use because you can see with both eyes.
With a monocular microscope, you can see with only one eye. Observers who are used to using microscopes can keep both eyes open anyway - this is the most comfortable way of using a microscope. Amateurs usually have to close one eye.
Microscopes have high magnification factors - monocular ones often go up to 600x and binocular ones up to 1600x. However, there is little depth of sharpening. Therefore, the slide has to be very thin and placed between a slide and a cover slip. Factory-prepared slides are often used.
Microscopes are good to use if you want to view very small objects such as cells or bacteria.
Lighting is very important when you work with stereo microscopes and microscopes. Lighting must be built in to be easy to use.
A stereo microscope must be lit from below for transparent slides and from above for opaque slides. In some cases, it may be appropriate to use both light sources together.
When working with microscopes, it is important to be able to regulate the light intensity. The simplest aperture is the hole aperture, where the light can be regulated in set stages. Light regulation is infinitely adjustable with an iris aperture. On binocular microscopes, the light intensity can often be regulated electronically. The lens beneath the slide stage is known as the condenser lens. On binocular microscopes, the position of the condenser lens can be adjusted to give the best view.
The cross stage holds and moves the slide. This is very convenient to use when you want to move the slide in tiny steps. On more expensive microscopes, the cross stage is fitted as standard.
Eyepieces with pointers are practical for when students want to ask what they are seeing. The student makes sure the pointer is pointing at the object, and no misunderstandings can occur.
An extra eyepiece with a different magnification gives you the opportunity to change the magnification of the microscope by changing the eyepiece.
Maintenance
It is very important to keep the lenses clean. No matter how good the optics of the microscope, dirty lenses will cause a poor image.
|
 |
| pH-meters
Differences between pH pens and pH meters:
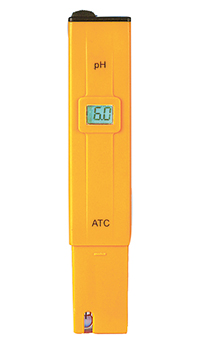
pH are available in two versions: "pH pens" and "pH meters".
Most pH pens have a fixed electrode which cannot be replaced. The advantage of pH pens is that they are convenient to use in the field. The disadvantage is that the entire pen has to be discarded if the electrode fails.
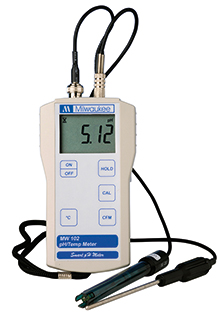
pH meters have a removable electrode. If the electrode fails, therefore, it is not necessary to replace the meter unit; you can just buy a new electrode.
pH meters with electrodes which are screwed directly onto the meter are handy for use in the field.
pH meters where the electrode is connected using a cable are convenient to use for accurate measurements in the laboratory.
The difference between single and two-point calibration:
To give accurate results, all pH meters have to be calibrated occasionally.
Meters with single-point calibration have to be calibrated using a pH 7 solution. The electrode is immersed in the solution and the meter is adjusted to show a pH of 7. After calibration, the meter gives accurate values for samples which are not too acidic or alkaline. The advantage of these meters is that they are quick to calibrate and often cheap to buy. The disadvantage is that these meters offer poorer accuracy with strongly acidic or strongly alkaline solutions.
Meters with two-point calibration give accurate measurements over a wider measurement range. They are calibrated first with a pH 7 solution, and then with either a pH 4 solution or a pH 10 solution. If you expect the samples to be tested to be acidic, you calibrate with a pH 4 solution, otherwise you choose the pH 10 solution. After calibration, the meter reports accurate measurements even for samples with very low or very high pH values.
Simpler meters are adjusted during calibration by rotating a knob or a screw. More advanced meters have automatic calibration. Here, a microprocessor ensures that the meter is adjusted.
Temperature compensation
As the pH changes according to the temperature, more advanced pH meters are able to offer temperature compensation. If the meter has manual temperature compensation, you have to measure the temperature yourself and adjust the pH meter. If the meter has automatic temperature compensation, the meter adjusts itself.
Electrode
Storage: The tip of the electrode is perforated by pores in the glass. If the electrode is stored dry, therefore, it is perfectly normal for a little electrolyte to seep out and be deposited as a white coating. As the pores must not be blocked, this coating has to be wiped away before you start measuring.
The best option is always to place the tip of the electrode in a storage fluid as this means the electrode is always ready to use. Ready-made solutions are available to buy, but you can make your own storage solution of KCl, which should be at least 3 M.
pH measurement in soil
For measurement in soil, there are special electrodes which can also be used for measuring in meat, for example. These fit pH meters with renewable probes.
On simpler types of pH meters for soil, the electrode consists of two different metals. Therefore, the electrode works as a battery and, depending on the pH of the soil, the probe supplies varying current strength to the meter. For the pH meter to return correct measurements, it is important to ensure that the metal surfaces of the probe are kept clean of deposits.
|
 |
|
Noice level meters
Tinnitus has become an ever more common problem as noise levels which are far too high often occur in our surroundings. Discussions on what kind of noise level is too high are easy to enter into. To avoid this, the easiest thing is to measure the noise level.
dB
To indicate the noise pressure level, we use a logarithmic scale in decibels (dB), where the lowest noise pressure which can be registered by an ear has been set to 0.
Doubling the number of equally loud noise sources increases the noise level by 3 dB, while 10 equally loud noise sources give an increase of 10 dB compared with one noise source. The human ear perceives a noise level increase of 8-10 dB as doubling of the noise.
Limits
The equivalent noise level over an 8-hour working day must not exceed 85 dB(A).
The loudest noise level must not exceed 115 dB(A). A short noise (impulse noise) lasting less than one second must be no louder than 135 dB(C).
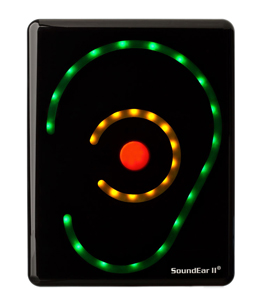
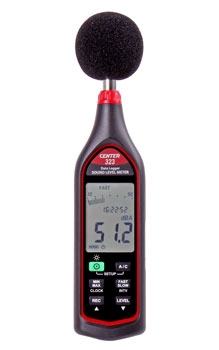
There are two main types of noise level meter - meters which show when the noise is too loud, and "ordinary meters" which measure the noise level in dB. Our SoundEar is an example of the first category.
SoundEar
The SoundEar is a noise level meter hung on the wall. It looks like a big ear, and under normal noise levels the ear shines green. The ear turns yellow when the noise level approaches the limit, and it turns red when the limit is exceeded.
The SoundEar is designed to show everyone directly when the noise level is too loud. You can then take action before anyone's hearing is damaged.
The SoundLog is a SoundEar which has a data output on the top where you put the logger supplied. The SoundLog is able to save noise data for up to 4 weeks.
Ordinary noise level meters
Ordinary noise level meters are available with very variable accuracy. The most accurate of these are classified in accordance with international standard IEC-61672
According to the Swedish Work Environment Authority's regulations, class 1 or 2 meters must be used for noise measurement. Class 3 may also be approved for more general measurements.
Noise level meters can have various functions:
- dB(A) and dB(C) filters
Most noise level meters have dB(A) and dB(C) filters in order to emulate the sensitivity of the human ear to various frequencies.
The dB(A) filter emulates the ear's sensitivity to various frequencies at a low noise level.
The dB(C) filter emulates the ear's sensitivity to various frequencies at a high noise level.
The difference between dB(A) and dB(C) can be considerable when measuring the same noise. When the dB(C) value exceeds the dB(A)- value by 20-25 dB, the low frequency noise may constitute a serious disruptive noise.
- Response
The speed of reaction of the meter is selected with this function. The options available are Slow, Fast and Impulse.
If Slow is selected, the meter slightly evens out the variations in noise level. In the case of meters which have no equivalent noise level, this allows you to gain a perception of the average noise level. The Fast function is selected when you want to measure rapid variations in the noise level. The Impulse function is used in an environment in which strong noise occurs with a duration of less than one second.
- Max value function
The meter shows the loudest noise level occurring over a measurement period. This is a very useful function as the loudest noise level is one of the limits in noise measurement.
- Equivalent noise level (Leq)
Only more advanced, integrating meters have this function. The equivalent noise level is an energy equivalent mean value of a varying noise level over a specific time. This is a very useful function as the equivalent noise level is one of the limits in noise measurement.
- Frequency analysis
Only very advanced meters have this function.
It may be interesting to carry out frequency analysis in some instances, e.g. when the noise appears to include tones (e.g. from fans). The noise is then divided up into a number of narrower frequency bands which are measured individually. Frequency analysis can also be used to see whether the noise is low frequency or high frequency, and to find out where the noise is coming from.
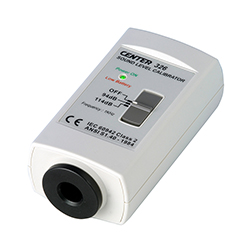
Calibration
There can be two types of calibration - calibration against an oscillating circuit built into the meter, and calibration using a separate acoustic calibrator.
Calibration using an acoustic calibrator is most accurate as any change in the microphone is also included in the calibration.
|
|
|
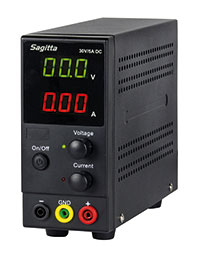
Power supply
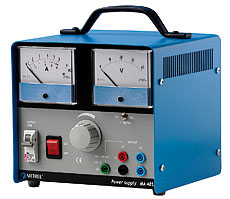
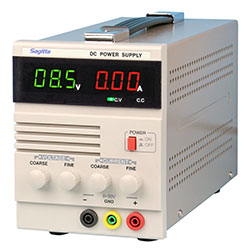
Analogue or digital
Analogue units with dials provide quick information on the change in voltage/current, not least if the dial indicates its maximum value by mistake!
With digital units, it is easier to make accurate settings and take accurate readings. This means you can often avoid having to connect an additional voltmeter or ammeter.
If the displays have different colours for voltage and current, you can avoid getting these confused when you read the display.
AC/DC or DC only
A lot of trials require DC only. DC units are easy and cheap to purchase. Some experiments, e.g. transformer trials, require AC, and sometimes you may need both DC and AC. AC/DC units are of course the most versatile, but they weigh more.
For many schools, it may be appropriate to have a larger number of DC units and fewer AC/DC units.
Transforming
In a DC unit, voltage is conventionally transformed and rectified through use of coils, an iron core, and a bridge rectifier. This makes the DC unit relatively heavy.
Voltage can also be transformed and rectified electronically. This is known as switching-mode power supply. Using this method makes the DC unit both smaller and lighter compared to a conventional DC unit.
Capacity V and A
If the unit has a maximum capacity of 30V/5A, you can do most tests. 2 A is often sufficient for AC trials.
6.3 V socket
The classic 6.3 V socket can save a lot of optical lamps.
Automatic fuses or electronic current limitation
Both automatic fuses and electronic current limitation effectively protect the unit in the event of a short-circuit. The automatic fuse trips when the maximum current for the unit is exceeded. The advantage of automatic current limitation is that you can set the unit to break at a lower current strength, thereby minimising the risk of damage to instruments connected.
Safety outputs
If the unit has safety outputs, both ordinary lab cables and safety-type cables will fit. If the unit has traditional outputs, safety cables cannot be used.
Smoothed DC
If the DC is smoothed, it hardly varies at all (e.g. Ripple < 1 mV). Completely unsmoothed DC pulses. Smoothing is important in the case of electronic trials, for example.
Stabilised voltage
In stabilised units, there are circuits which make sure that the voltage is constant no matter how much load is applied to the unit.
|
|
|
Burner
LPG
LPG consists mainly of propane, propylene and butane. This gas is heavier than air but mixes readily with the ambient. To provide warnings of leaks, a substance with an unpleasant smell has been added to LPG; this can be smelt even at very low concentrations.
When a mix of LPG and air is combusted optimally, the "heart" of the flame is greenish-blue. Only carbon dioxide and water are then formed. The temperature of the flame is high and it can easily melt glass and some metals.
Too little air, a yellow flame, results in incomplete combustion; and in this instance, the toxic gas carbon monoxide (CO) is formed.
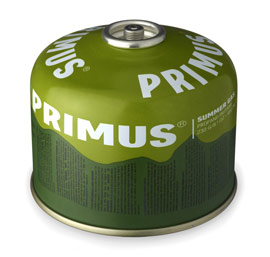
Different LPG containers and burners
Traditional burners are constructed for a lower gas pressure than that present in LPG bottles. This is why a reducing valve is mounted on the bottle, and then an LPG hose is connected between the reducing valve and the burner. It is important to ensure that the hose connection is tight - ideally, use a hose clamp.
As LPG for low pressure burners is normally purchased in larger quantities (larger bottles), the operating cost is lower than in the case of single-use containers.
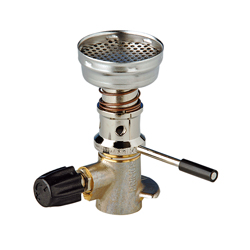
Burners for single-use containers are screwed directly onto the container. Some containers are punctured when the burner is screwed on, while others have a self-closing valve.
Single-use containers with burners are very easy to handle and so have become very popular in schools. The relatively small amount of LPG in these bottles (e.g. 220 g) reduces the risk of a possible leak.
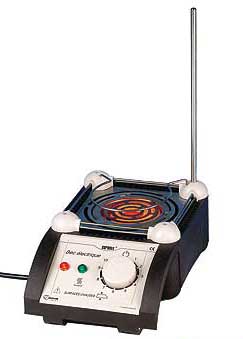
Electric burners
Inside the electric burner is a glow coil which is heated electrically. The temperature is set using a thermostat. Just above this coil is a grille where - for example - a beaker containing liquid is placed. The hot air flow together with the radiant heat from the coil effectively heats up the beaker containing liquid. Heating is slightly slower than with LPG, but the operating cost is low.
A stand is supplied with some electric burners. You can place a three-finger clamp on this to hold - for example - round flasks, test tubes or measurement probes.
The very low operating cost, together with its safety, has made the electric burner a popular alternative to LPG.
Bear the following in mind:
Is the burner standing firmly (low and wide)?
Is a stand rod supplied?
Is it stackable?
Is it odourless when it gets hot?
LPG burners or electric burners
Electric burners have become popular for reasons of safety. They can replace LPG burners except for when you want to melt glass or display metal spectra.
For the latter, there are tablets which are placed on the electric burners and ignite, but the temperature is not sufficient to display spectra clearly.
One alternative in these instances is to use a burner with a single-use container. Then you can take the opportunity to show how LPG is used and talk about safety. LPG is used in the home and for outdoor pursuits as well.
|
|
 English EUR
  Dansk DKK
  Norsk NOK
  Suomeksi EUR
  Svenska SEK
  Svenska EUR